Calendar
May 2024 M T W T F S S 1 2 3 4 5 6 7 8 9 10 11 12 13 14 15 16 17 18 19 20 21 22 23 24 25 26 27 28 29 30 31 -
Recent Posts
Archives
- January 2024
- November 2023
- October 2023
- September 2023
- August 2023
- July 2023
- June 2023
- April 2023
- March 2023
- February 2023
- December 2022
- November 2022
- October 2022
- September 2022
- August 2022
- July 2022
- April 2022
- March 2022
- February 2022
- December 2021
- November 2021
- October 2021
- September 2021
- August 2021
- June 2021
- May 2021
- April 2021
- March 2021
- February 2021
- January 2021
- December 2020
- October 2020
- September 2020
- August 2020
- July 2020
- June 2020
- October 2019
- September 2019
- August 2019
- June 2019
- May 2019
- March 2019
- February 2019
- December 2018
- November 2018
- October 2018
- September 2018
- August 2018
- July 2018
- June 2018
- May 2018
- April 2018
- March 2018
- February 2018
- January 2018
- December 2017
- November 2017
- October 2017
- September 2017
- January 2017
- October 2016
- September 2016
- August 2016
- July 2016
- June 2016
- May 2016
- April 2016
- March 2016
- February 2016
- December 2015
- November 2015
- September 2015
- August 2015
- July 2015
- June 2015
- May 2015
- April 2015
- March 2015
- February 2015
- January 2015
- November 2014
- August 2014
- August 2013
- July 2013
- June 2013
- March 2013
- February 2013
- November 2012
- October 2012
- August 2012
- July 2012
- June 2012
- May 2012
- April 2012
- March 2012
- February 2012
- January 2012
- December 2011
- November 2011
- October 2011
- August 2011
- July 2011
- June 2011
- April 2011
Categories
- Bathroom Cleaning
- Bedroom Cleaning
- Carpet Cleaning
- Cleaning Products
- Cleaning Service
- Cleaning Service Clearwater
- Cleaning Service Tampa
- Cleaning Tips
- Clearwater
- Condominium Cleaning
- Finest European Maids
- Floor Cleaning
- Green cleaning
- Holidays
- Home Cleaning
- Home Organizing
- House Cleaning
- Kitchen
- Living Room
- Maid Service
- Maid Service Tampa
- Moving
- Office Cleaning
- Palm Harbor
- Pinellas County
- Press Release
- Projects
- Residential Cleaning
- Spring Cleaning
- St. Petersburg
- Summer cleaning
- Tile Cleaning
- Tips
- Uncategorized
- Vacation Condominium
- Vacation Rental
- Windows Cleaning
Home Cleaning
Cleaning the house after repair
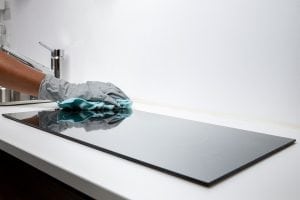 After experiencing repair, look forward to life in the updated interior? We will tell you how to get rid of dust and stains and bring the room into a residential condition in a short time.
Tip:
Even if you decide to do without the help of cleaning professionals, we recommend that you buy or rent specialized equipment. A professional vacuum cleaner will help to cope with building dust on the floor, walls and ceiling faster and more efficiently. Of course, you can use it only on the surfaces provided for this, having pre-tested it on a small and subtle area.
Key points:
- Hiring professionals to clean the premises, discuss in advance the details of the work and ask for an estimate
- Cleaners will help clean and disinfect your floor
- Use an aqueous solution of baking soda to wash dusty windows
Tip:
Even if you decide to do without the help of cleaning professionals, we recommend that you buy or rent specialized equipment. A professional vacuum cleaner will help to cope with building dust on the floor, walls and ceiling faster and more efficiently. Of course, you can use it only on the surfaces provided for this, having pre-tested it on a small and subtle area.
Hooray! You survived the repair! The worst is already behind and there was, it would seem, a trifle – to wash your new wonderful interior from a layer of construction dust and stains of various origins, that is, a spring cleaning. Looking around the debris of construction debris and wincing at the dust, you are horrified to imagine that it will take a very long time to put everything in order. We will not hide, the work is difficult, but we will help to ease your work!
Сleaning company
The easiest way to deal with dirt after construction and repair is to hire professionals from a cleaning company to clean houses and cottages. However, the company should be chosen very carefully:
- Do not trust cleaning companies-one-day – letting strangers into the house is dangerous. A professional company with a good reputation will be able to guarantee not only a quality work done, but also the safety of your things.
- Listen to the recommendations of friends and user reviews.
- Do not pursue cheapness! Initially, the attractive price promised to you can increase several times after the work is done unclean by the hand specialists. Describe in detail the specialist the front of the work and ask him to make an estimate.
If you are determined to cope with the task yourself, listen to our advice.
How can I cope with cleaning the room after repair?
Experts recommend keeping the room as clean as possible during the repair. Afterwards it will save you a lot of time. “It’s easier said than done”, you’ll notice, so roll up your sleeves and proceed directly to the cleaning:
- First you need to take out all that is superfluous. Fold the large garbage into bags and take it out into the street. If it turns out to be too much, you will have to take it to the nearest landfill. Then collect less garbage and sweep the floor.
- Vacuum the surfaces. If you have the opportunity, use a construction vacuum cleaner – it is much more powerful and faster to cope with the task. Corrosive construction dust could settle even on the ceiling and walls, so start vacuuming from above, moving down the walls, and finishing cleaning the floor. Do not forget to vacuum the corners and the skirtings.
- With the help of cleaning and detergents, make a damp cleaning of the room, starting with the walls, cornices and windows and ending with the floor.
- Even if the soft furniture has been carefully concealed, it should be carefully cleaned using a vacuum cleaner, a cleaning agent or a soap solution.
- Thoroughly ventilate the room.
With a successful scenario, cleaning the apartment will be completed. But, unfortunately, except for dust and debris, after repairs there will probably remain stains from paint, plaster and the like.
How to get rid of stains left after repair?
Before you start cleaning, test the cleaning agents and recipes you have selected on a small and subtle area of the surface to avoid damage. When working with cleaning agents and solutions, do not forget to wear rubber gloves.
- Traces of construction foam can be removed with a knife or special solvent.
Dust and dirt from the windows can be removed with water with the addition of washing soda, and then wipe dry with newspapers. - Oil stains will disappear without a trace if rubbed with turpentine or powder with enzymes.
- Traces of scotch can be removed with sunflower oil or a liquid containing acetone.
That’s all! Now you can arrange furniture, distribute things to places and enjoy your improved home!
Image credit: pascalhelmer
How to get rid of dust and unpleasant odors: Some useful tips
 Knowing the secrets of cleaning and having the right tools will greatly facilitate the cleaning process! Learn how to quickly and easily get rid of dust and unpleasant odors!
Tip
Get rid of unnecessary things! The more items in your home, the more dirt and dust they save. Perform an annual general cleaning. Throw out all unnecessary and reduce the number of dust collectors for the coming year.
Key points:
The best dusting advice: clean from top to bottom.
After cleaning the dust: vacuum the carpets to clean everything up to the last dust.
Prevent the appearance of dust and unpleasant odors: open the window at least 10 minutes a day to freshen the air in the apartment.
Wiping the dust in the whole house can seem like an immense work. But do not worry – you can still win the battle with dust. Dust consists of particles of dead skin, wool of pets, dust mites and pollen, among other things. So it’s not surprising that, in the absence of wet cleaning, the house will look untidy, and the rooms will have a musty smell. Effective struggle with dust and prevention of its appearance can solve any problems and save you from unpleasant odors, turning your house into a healthy and hypoallergenic home. All that you need to get rid of the house of dust and unpleasant odors are the correct devices and a few useful tips.
How to get rid of dust and unpleasant odors?
- Ideally, these measures need to be taken 1-2 times a week to maintain a healthy, hypoallergenic and to the same fragrant habitat! Always start a wet cleaning from the upper levels – high cabinets and furniture – moving down.
- For shelves and hard surfaces, a damp rag for dust is best. On a wet rag dust clings much better than on a dry one. You can also use a brush of ostrich feathers to remove dust, as the electric charge of feathers clings dust, not spreading it around the room.
- To clean the wallpaper and painted walls, use a rubber sponge. Wiping cloth and gentle cleaning agents.
- Decorative carpets and carpets are best simply vacuumed. It is best to use apparatus with air filters of fine cleaning, which retain even the finest dust. Also vacuum cleaner after wiping the dust to collect the remaining dirt after cleaning.
- Curtains and furniture upholstery can be vacuumed on low traction by putting a special nozzle on the vacuum cleaner.
- Floor coverings without lint should be washed with a mop, and not swept with a dry broom. So you quickly get rid of dust and mustiness and prevent it from coming back soon.
- For hard-to-reach areas or special technical equipment such as a keyboard, use a compressed air cartridge or a blow-off gun to get rid of dust in cracks and furrows.
- Use a scented cleaner to clean the room with a pleasant smell, or add a few drops of your favorite essential oil, such as lemon or tea tree, onto a damp cloth that you wipe the dust off.
How to prevent the accumulation of dust and odors?
Frequent wet cleaning can easily cope with the problem areas of the apartment, but there are many ways that will help avoid the early return of dust and unpleasant odors.
- Ventilate as often as possible. Clean air is important not only to prevent the appearance of dust, but also to eliminate bad smells. In cold weather, open the window for 10 minutes to run into the apartment a portion of fresh air.
- Think about the use of an air purifying system. For their effectiveness to be noticeable, such systems must be installed in each room.
- Change the filters in your ventilation, air conditioning or heating system, as they can accumulate dust, which they then distribute to your apartment.
- When cooking or using the bathroom, use the extractor to remove steam and odors from the room.
- For deep cleaning, regularly wash carpets with shampoo or seek the help of specialists to clean their steam professionally and avoid the accumulation of unpleasant odors.
- Once a week, spray curtains and upholstered furniture with a cloth freshener. To get rid of dust, wash removable covers in the washing machine or ask for dry cleaning at least once a year.
- Upholstery and carpets are the most active dust collectors, so give preference to leather furniture, as well as hard flooring instead of carpets and blinds instead of curtains.
- If possible, change bed linen once a week. To reduce the risk of dust mites, use a hypoallergenic mattress cover.
Regularly take out the garbage, without waiting until the trash can is filled to the top.
Image credit: qimono
The best ways to clean the kitchen
How to keep the kitchen clean? Learn how to clean the slab, get rid of the lime coating and rust on the faucets.
Key points:
– To clean the cooker, use grease-cleaning detergents, having pre-tested its effect on a small area of the surface
– Pay special attention to the sink and faucets, since it is there that accumulates a large number of microbes
– Thoroughly clean the work surfaces, especially after cooking meat
Where in the kitchen should I clean? Everywhere!
This task may seem unbearable, but the kitchen is the place where you prepare food. Therefore, it is absolutely necessary that the working surfaces, dishes and appliances are perfectly clean.
In the kitchen, there are millions of microbes. Most of them are harmless, but there are also such as, for example, E. coli and Salmonella, which can become a catalyst for diseases, especially in children and older people. Therefore, keeping the kitchen clean is not a whim, but a vital necessity.
But there is good news. There are many ways that will make your kitchen almost sterile and do not take much time. Here are just a few tips to make your kitchen clean, beautiful and extremely hygienic.
Dangerous microbes spread with incredible speed, so it is very important to keep clean not only pots and pans, but also other surfaces and objects in your kitchen. Microbes can settle in the most unexpected places: on the switch plates, on the buttons on the microwave or on the faucet – that is, on any surface to which you touch hands dirty with raw meat or eggs.
How to clean individual sections of your kitchen
If you ever wondered how you can clean a gas stove or a work surface, here are some tips. It is best to use kitchen cleaners that are very effective and do their job well, making your kitchen clean and safe.
How to clean an induction cooker
Clean the glass ceramic plate will help a special scraper and detergents, often produced by the manufacturers themselves of these plates.
The plates of the electric cooker are also unpretentious, and a wide range of products is suitable for them.
How to clean the sink and faucets in the kitchen
There are two main reasons why you need to keep the faucet and kitchen sink in the kitchen clean.
First, microbes begin to multiply there, so you need to thoroughly wash the sink after cooking.
Secondly, nobody likes dirty fingerprints on the shiny surface of the faucet.
How to clean the work surface
The work surface in the kitchen should be washed after each cooking. It is very easy! If you cut vegetables or fruits, simply wipe the surface with a damp cloth. If you cook meat, which could contain salmonella or E. coli, it is better to use antibacterial cleaning agents.
Natural Cleaners for the Kitchen
If you prefer natural cleansers for the kitchen, then you have plenty to choose from. To the floor and work surface shone, try mixing the water and vinegar in equal proportions and wipe them. This solution not only removes dirt, but also neutralizes unpleasant odors.
Image credit: StockSnap
Residential and Rental Home Cleaning Tips
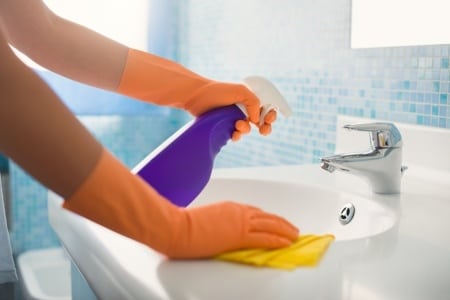 Engaging a professional home cleaning service can surely keep your abode perfectly spic and span throughout the year and also keep you completely free for attending to your own business. But hiring a holiday rental cleaning agency on a long-term basis could also burn a hole in your pocket. You can go DIY when it comes to maintaining the cleanliness and orderliness of your home or an additional abode that you let out as a holiday accommodation to tourists and travelers.
You can abide by the following home cleaning tips that are taken advantage of by professional cleaners and speed up the tidying process in your own home without compromising on the quality of course.
Always schedule before getting started
Almost all skilled and experienced professional cleaners always follow one golden rule when it comes to home cleaning or rental cleaning and that is drawing up a schedule. Preparing a plan on how to wish to go about the entire process will help to complete the job sooner than you expect and believe it or not, you’ll be surprised at the results.
Invest in essential cleaning kit and tools
When we talk about home cleaning tools, we do not mean the ones that you see in sci-fi movies and TV ads that are shown with monotonous regularity in between sitcom breaks. Dump the rackety and worn out sponge mop and go for cotton or terry cotton wipes and dusters. Buy a handy vacuum cleaner with additional attachments for pulling out the dust from deep inside sofa covers and underneath the wardrobes.
Investing in versatile and resourceful house cleaning implements will stand you in good stead for years to come.
Dress up
You could be forgiven for having the impression that employees under the payroll of professional cleaning company wear uniform largely to appeal to your aesthetics. Most people think in a similar manner. Contrary to what you and most people think, home cleaning professionals dress up to do the job effectively and also to feel comfortable while they’re at it.
Just check out the items they put on starting from knee pads to shoes and from gloves to goggles to protect themselves from toxic chemicals. An apron is indispensable for housing tools and keeping supplies handy so that you do not have to run helter-skelter in search of the same. Garb yourself in a proper uniform that covers you from neck to ankle.
Keep all your cleaning tools ready
Any rental cleaning project is back breaking and hectic in itself. On top of that if you have to run up and down the stairway, and from one room to another umpteen times, you’ll get bogged down much before you’re done with cleaning. Keep a tote-box or tray handy where you can store all necessary tools including rags, mops, brushes, and cleansers.
Declutter and organize first
Ask yourself honestly whether you’ll be able to proceed with the cleaning project smoothly if the floors, furniture, counters, tabletops, and other surfaces are in a state of absolute mess. First clear the paper shreds, toys, soiled dishes, and dirty clothes from each and every horizontal surface before you get hold of the cleaning brush.
Image Credit: diego_cervo
Useful Tips for Cleaning Hardwood Floors
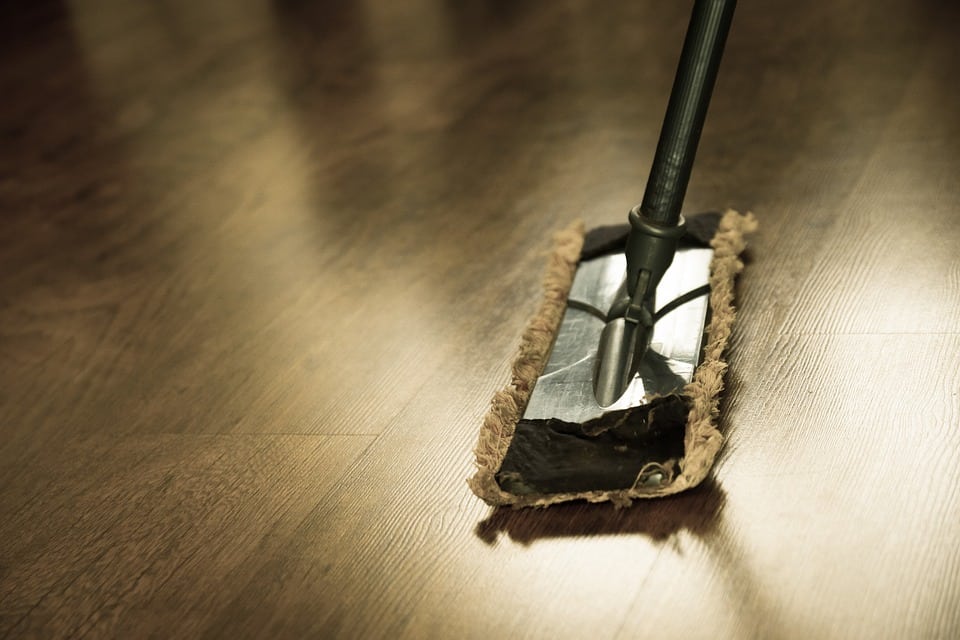 There’s no denying the attractiveness of a hardwood floor that immediately arrests your attention the moment you step into a home. The beauty and elegance associated with a hardwood floor are unmistakably timeless. On the other hand, a hardwood floor is extremely durable that can retain its originality for years and also has the ability to withstand wear and tear for long periods.
However, a hardwood floor is bound to lose its texture and capacity to withstand wear and tear if proper care of the same is not undertaken regularly. Any home cleaning project is incomplete if the floors of a house or dwelling are not cleaned and maintained periodically. Following are some of the recommended ways when it comes to floor cleaning.
1. Sweep up and mop daily
One of the simplest floor cleaning tips that you can take advantage is to ensure that the floorings in your home are swept and mopped on an everyday basis. Use a good quality broom with soft hairs (the bristles should be hard-wearing and should not come off easily) for sweeping the floors thoroughly. Investing in a broom that’ll serve you for years will be a practical decision and will not cost much either.
A broom will enable you to sweep out tiny and microscopic particles that get deposited over time and may cause scrapes on the hardwood floor. After you’re through with sweeping, use a moistened mop or swab (preferably of fabric) for wiping the floors. This’ll keep the floors spic and span.
2. Take out the vacuum cleaner once in a while
There are areas in your home that you won’t be able to access with the broom. Spaces beneath cupboards, settees, beds and other household furniture are some of the areas that the broom won’t be able to reach. However, specks of dirt and microbes easily find their way into the most impregnable of areas and settle down. You can conveniently clear the dust from areas that a broom cannot reach with the help of a vacuum cleaner.
Any standard portable vacuum cleaner comes with extender attachments and accessories that can help in drawing out dust particles from parquets, tile grouts, and other difficult-to-reach areas.
3. Either wax or wash clean the floors
Whether you’ll use wax polish or detergent water for retaining the glossiness of the hardwood floor will depend upon nature of the surface sealing. Surface sealing could comprise of synthetic resin like polyurethane or urethane that lends toughness to the parquet, cork, timber or amalgamated flooring. Once the sealing dries up completely it makes the floor highly resistant to water, oil, alcohol, dilute acids, and alkalis.
The interior decorator or the company that you engaged for doing the flooring in your residence may have suggested you a premium quality cleaning product for holding on to the patina. However, high costs might act as a deterrent from using those products on a routine basis. The safest and the most practical option for you are to use water and a mild detergent as far as surface-sealed hardwood floor cleaning is concerned.
You’d just need to mix a quarter or a half cup of mild cloth-washing or dishwashing detergent to a pail containing water. Thereafter dip a swab and squeeze the cloth fully before mopping the floors. If you want to avoid the floor picking up smudges or stripes, better stick to using distilled water.
4. What if the floors are untreated or treated with shellac or varnish?
Floors that have been left untreated or shellac, varnish or oil has been used for surface sealing are vulnerable to humidity and not as durable as floorboards treated with synthetic resin. In such a scenario, you’d have to take out the old waxing from the tiles using a stripper. After the panels have dried fully, apply a fresh wax coating.
Picture Credit: jarmoluk
Posted in Cleaning Tips, Floor Cleaning, Home Cleaning
Tagged cleaning tips, floor cleaning, Home Cleaning, vacuum cleaner
Leave a comment
Pet Stain Cleaning Calls For Power!
 We love our pets, but to be a responsible owner one must take care fo the pet and any damage it produces. This is why pet stains are something that calls for quick action and patience.
First of all, you’ll need to be on the ball when a stain occurs. The pet doesn’t know it’s wrong and can get confused. It might even use the same spot over again as it doesn’t have the intelligence to know that you don’t want your expensive rug stained. They stain areas to show territory and that’s millions of years of evolution talking. So when it comes to pet stains you need to be armed with the right materials and follow a precise regimen
Paper towels or other absorbent cloth must be put down on the fresh stain first. Tap the cloth slowly and then put on more pressure to absorb the liquids If it’s a dry stain, you’ll have used a solution to break up the stain so that saturation and absorption are possible. Add fresh paper towels and cloth to absorb all the liquid and then repeat after you’ve put a bacterial/enzyme digester down and repeat the process Next put a piece of clear plastic over the stain to allow the solution to work. Time depends on size and severity of the stain but usually, an hour should do. Now you can use towels or cloths even brushes to remove any remaining solution and let the arm dry. If need be you might have to vacuum excess dirt or residue granules. Wait to see if any discoloration has occurred and if need be, start over to remove more if the stain is a major cleaning challenge.
The old standbys like vinegar and warm water do wonder. There are commercial products available that one might want to check out and for the Green folks out there, they are environmentally friendly products you just have to search for them.
Different pets make different messes so what a cat does is definitely different from the dog. Both urinate and drop feces but the two species are unique in how they do so. If things get out of hand and you need more cleaning power, it’s best to think about hiring a professional cleaning expert They’ll know what materials to use and how to handle the damage without creating more. They may also have better advice on how to prevent such things and how better to remedy situations before having to call them in.
You want your house to look and definitely smell good. Pets can make that impossible when they get out of hand. There’s just so far you can go with controlling an animal and that means being prepared for accidents. So keep cleaning supplies around in a handy way and then do what’s needed to keep your home neat and sparkling fresh.
Don’t forget to get a good pet trainer if things really get out of hand. They can do wonders with our furry friends.
Picture Credit : Home Cleaning
Posted in Carpet Cleaning, Cleaning Products, Cleaning Tips, Green cleaning, Home Cleaning, House Cleaning
Tagged bacterial, enzyme, pet stain, vinegar
Leave a comment
Cleaning your Bathroom Floors: Tiles and Cleaners
When it’s time to clean the bathroom floor it may seem like it’s an impossible task, intimidating, and discouraging. Using the right cleaning agents make all the difference in scrubbing down, cleaning, and preventing future dirt and grime buildup. Without the right cleaning ingredients, this can become an easier albeit not the most enjoyable task. It’s critical that you prepare and use the right types of chemicals when cleaning your bathroom tile or you could cause damage or make it worse. Let’s consider some steps to prepare, treat, and prevent future dirt build-up on your bathroom tile floor.
Prepare the Right Way: Why to Choose Vinegar
One of the most effective, natural ingredients is not bleach or other powerful and harmful ingredients that can be tough to breathe in or leave a funky smell behind. In fact, one of the most optimal cleaning products is simply vinegar with water. Vinegar acts as a natural cleaning agent to remove dirt, mold, hair, and other sticky residues accumulated on your bathroom floor over time.
How to Get Started
Prepare yourself two buckets, fill both with warm water, and mix one gallon of water with a cup of vinegar in the other. A mop is very useful, but it’s helpful to also get some sponges just in case you come into hard to reach places. Rags can be helpful as well, and if you have an old towel or shirts you don’t use anymore you can use these to dry the floor when you’re done.
Try to find yourself a pair of gloves and open up the windows if possible to keep away the tough, potent smell of vinegar. If you do not have windows to open in the bathroom then setup and turn on a fat to circulate the room while you clean but keep it at a distance so that it does not make a mess and blow all of the dirt all over and make the job tougher.
Scrubbing it Down and Enjoying the Results
If it’s been a while since you’ve cleaned your bathroom tile floors it may be necessary to add a few drops of dish detergent to the water solution you make to add dirt removing strength. If you have marble or stone floors then this method and these ingredients are not recommended as they can be harmful.
If you have especially troubling dirt and debris build-up on your bathroom floor it may also be necessary to use an anti-bacterial soap to really get everything clean. Remember, it’s not so much of how good it smells in your bathroom when you’re done, rather, it matters most that you’ve got all the dirt up and have properly dried your floors – as moisture can attract and build up bacteria and dirt again. Happy Cleaning!
Image credit: Jennifer Huls
7 Tips for Summer Cleaning and Home Maintenance
As that warm weather (in most places) rolls around this year, cleaning and managing your home for upcoming family gatherings and guests can be a little hectic when first kicking off the season.
Summer cleaning doesn’t have to be an undesirable task, in fact, you should take pride in your home, so check out the following 7 pieces of advice and tips for maximizing your summer cleaning efforts!
1. Get the little ones involved! Don’t be afraid to assign (age appropriate) cleaning tasks to your little ones or spouse – so that you can collaborate on cleaning your home post-winter together as a team. The more the merrier, and this will also help cut back on total time required to clean your home and prepare for the hot, summer season to come.
2. Dust down places high and low, and consider changing air filters on any types of devices, air-conditioner equipment, and ventilation shafts throughout your home that likely built up bacteria or debris from the previous season.
3. Before storing all of those pillows, comforters, and sheets from the previous season make sure you wash them thoroughly, and hang dry them outside to maximize removal of harmful bacterial, dirt built up, and any possible critters that might have accumulated on them over time unknown to you and your family.
4. Take your family shopping to the local department store and pick out fun, family-styled mats to put on the interior and exterior of each of your doorways. Thanks to hotter climate, bacteria, bugs, and dirt really become common throughout this season, so make this an integral part of your summer cleaning efforts!
5. Wipe down, dry, and clean all of your windows interior and exteriors throughout your home. Make sure you use a microfiber or gentle cloth to prevent smudging, and get off all that icky’ bacteria and dirt build-up from previous seasons.
6. Vacuum and ‘suck up’ any and all dirt left behind on your rugs, mats, floors, and wipe down behind your beds and other hard-to-reach places because you can bet dust and dirt is likely to have built up over time. Don’t forget to dust the corners and ceilings if possible! If not, borrow a tall neighbor, spouse, or friend to get the job done right! Just be careful if you’re going to do it yourself, use a steady (preferably) ladder, or chair but try to make sure someone is spotting you for safety-sake.
7. Lastly, clean up and close up your fireplace if you have one, sweep the chimney with the necessary treating log or agent, and put away all related materials, wood, and tools to clear the path and make your home more “roomy”.
Summer cleaning doesn’t have to be a headache, and with the right game plan (and hopefully team players) it can be done the right way. If possible, try to go through this routine every month or two to maximize a clean, happy home environment.
Image credit: amveldman
Posted in Home Cleaning, House Cleaning, Summer cleaning
Leave a comment
Battling Bacteria And Germs In The Kitchen
 The kitchen is the place where you prepare your foods. It cannot be compromised by bacteria or germs or the results could be both dangerous and even fatal. There should be no half stepping regarding yours and your family’s safety in this regard and there are practices and tips to minimize the risks.
You can’t get rid of all bacteria and germs but you can minimize their presence by following some specific practices. First you have to look at who and what enter your kitchen. Although we love them, we should keep pets out of the kitchen. They track in microbes from outside or from other pets or people and can do so in spots that you wouldn’t think they can access. If you can’t keep the pet out of the kitchen, then make sure you follow it around so that you can clean those spots that the critters get into. This means toys they chew on too.
The surfaces of the kitchen area are where the microbes rest on. Kitchen cleaning here calls for a cleaner that is a disinfectant that won’t harm the counter tops or table tops or the appliances nor are toxic to people. Using sponges and cloths are another area of kitchen cleaning that you have to be careful of. Sponges can be a place where bacteria thrives. You need to clean your sponges daily by dipping them in an anti-bacterial solution. Hot water doesn’t work unless you boil your sponges and also your cloths you use to clean with. Microbes can withstand incredible temperatures, but they can’t survive the chemicals and compounds that disrupt their biological functions such as a good anti-bacterial solution. Clean sponges and cloths daily. Find a bucket that you can place somewhere and at the end of the day, put the sponges and cloths in there with a good amount of disinfectant and water. The next morning, take them out and rinse. Have tow sets of cleaning cloths and sponges. One for day, one for night. This way you’ll have a readily available arsenal of kitchen cleaning materials.
Floors need a good mopping with disinfectant especially. If you walk around your kitchen in shoes and so do the other family members, there’s no telling how many microbes get onto the floor’s surface. Sweeping won’t do jack. You need to mop daily, especially if you have pets or babies that like to play on the floors. Ten minutes a day to clean that floor at night or in the morning means getting a foothold on preventing bacteria and germs from dominating.
Remember to wipe down appliances and handles once a day that see lots of activity like the fridge door handle and kitchen doorknobs. These places often miss the attention of the need for constant cleaning but are the most infected areas.
No need to mention the importance of disinfecting the sink or the table top where we eat. Overall, getting a great arsenal of disinfectant cleaning solutions, as simple as vinegar and water, and establishing a regimen of cleaning daily by all members of the household, you’ll have a kitchen cleaning procedure that all can take responsibility for and minimize the risks caused by those itty bitty critters of the microscopic kind.
Image credit: My Make OU
Posted in Cleaning Service, Home Cleaning, Kitchen
Leave a comment
Home Cleaning for the Holidays
 The holidays can be hectic. Whether it is preparing food for guests, running around to find presents, or keeping up with the other daily activities of living, there is always something going on in the winter months. With all of the moving pieces, it can be hard to keep a tidy home. Here are a few cleaning tips which will hopefully keep your house shining just as bright as the holiday lights do:
- Remove your shoes when inside the house. And make others do it as well. Shoes tend to track dirt and other unwanted things into the house, especially during the cold and wintery holiday months. It is easy to place a shoe rack or mat near the door which will let guests know to remove their shoes.
- Clean strategically. When cleaning, don’t just randomly clean bits and pieces, moving all around the room. Instead systematically start in one top corner and work your way around and then down. Remember, gravity is your friend here and you should utilize it properly. Dirt and dust falls down and then you just have to clean the floors.
- The windows are the openings to your home. Keep them and the window sashes clean. It will help reduce unwanted dust and dirt from outside making its way into your lovely home.
- Let cleaning solutions do their job. Cleaning solutions are made to get rid of dirt and grim. The chemical formulas are specifically tailored for a purpose, so let them do their job by letting them sit on whatever you are trying to clean before wiping away. This will reduce the amount of effort you need to put in in order to get that squeaky clean you desire.
- Use a squeegee in the bath and kitchen. It will help prevent mold and soap scum. Doing this even every few showers will help prevent a much bigger mess that you will have to clean up in the future.
Home cleaning during the holidays can be a chore, but there are a number of tips and methods you can use in order to limit the buildup of dirtiness as well as to clean more efficiently. Follow the easy steps above and watch as you have a much more relaxing holiday season and a much cleaner home to boot! Good luck with keeping the house clean and have a good holiday season!
Image credit: Klara Viskova
Posted in Cleaning Tips, Holidays, Home Cleaning, House Cleaning
Leave a comment


