Calendar
December 2025 M T W T F S S 1 2 3 4 5 6 7 8 9 10 11 12 13 14 15 16 17 18 19 20 21 22 23 24 25 26 27 28 29 30 31 -
Recent Posts
Archives
- January 2024
- October 2023
- September 2023
- July 2023
- June 2023
- April 2023
- October 2022
- September 2022
- April 2022
- March 2022
- February 2022
- December 2021
- November 2021
- August 2021
- June 2021
- May 2021
- April 2021
- March 2021
- February 2021
- January 2021
- December 2020
- October 2020
- September 2020
- August 2020
- July 2020
- June 2020
- October 2019
- September 2019
- August 2019
- June 2019
- May 2019
- March 2019
- February 2019
- December 2018
- November 2018
- October 2018
- September 2018
- August 2018
- July 2018
- June 2018
- May 2018
- April 2018
- March 2018
- February 2018
- January 2018
- December 2017
- November 2017
- October 2017
- September 2017
- January 2017
- October 2016
- September 2016
- August 2016
- July 2016
- June 2016
- May 2016
- April 2016
- March 2016
- February 2016
- December 2015
- November 2015
- September 2015
- August 2015
- July 2015
- June 2015
- May 2015
- April 2015
- March 2015
- February 2015
- January 2015
- November 2014
- August 2014
- August 2013
- July 2013
- June 2013
- March 2013
- February 2013
- November 2012
- October 2012
- August 2012
- July 2012
- June 2012
- May 2012
- April 2012
- March 2012
- February 2012
- January 2012
- December 2011
- November 2011
- October 2011
- August 2011
- July 2011
- June 2011
- April 2011
Categories
- Bathroom Cleaning
- Bedroom Cleaning
- Carpet Cleaning
- Cleaning Products
- Cleaning Service
- Cleaning Service Clearwater
- Cleaning Service Tampa
- Cleaning Tips
- Clearwater
- Condominium Cleaning
- Finest European Maids
- Floor Cleaning
- Green cleaning
- Holidays
- Home Cleaning
- Home Organizing
- House Cleaning
- Kitchen
- Living Room
- Maid Service
- Maid Service Tampa
- Moving
- Office Cleaning
- Palm Harbor
- Pinellas County
- Press Release
- Projects
- Residential Cleaning
- Spring Cleaning
- St. Petersburg
- Summer cleaning
- Tile Cleaning
- Tips
- Uncategorized
- Vacation Condominium
- Vacation Rental
- Windows Cleaning
Tag Archives: #cleaning Tip
Cleaning The Computer Safely
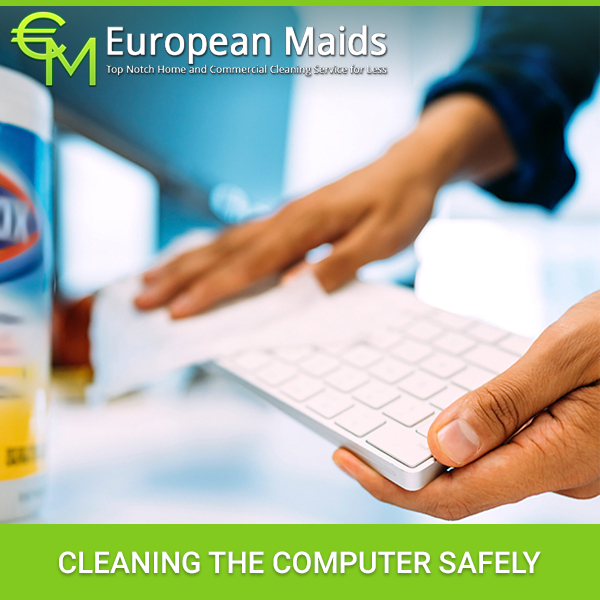 Dust is not just an unattractive proposition, it can also damage or possibly even destroy the components of your pc. You need to clean the computer regularly to keep it working in good condition and avoid the undesired and expensive repairs. You must also clean the computer casing and the monitor sides to avoid the dirt build-up. Keep in mind that dust is the main enemy of your computer. You can use the anti-static cloth for lightly dusting off the casing. Never use strong solvents or furniture cleaners for the purpose.
Keyboard cleaning: Food, dust, and cleaning along with other such particles are likely to get stuck below the keys of your keyboard and eventually lead to preventing the computer from working properly. Here are some fundamental tips to help you from keeping the keyboard clean. Unplug your keyboard from the PS 2 or USB ports. If it is plugged you will have to shut down the PC before unplugging it. The keyboard must be turned upside down to remove dust and dirt. You can use compressed air for cleaning between the keyboard keys. Now, use a paper towel or cleaning cloth with alcohol for cleaning the keytops. Keep in mind that do not pour any liquid onto the keys. Once it is dry you can reconnect the keyboard to the computer.
Monitor cleaning: Various things such as fingerprints, dirt, and dust can all lead to making your computer screen impossible to read. But, it is easier to clean the monitor whenever required. You can get some monitor cleaning kits from the market but keep in mind to use the right cleaner depending on the surface of the screen. The best way is to use a soft clean cloth with water. Never use glass cleaner for cleaning the monitor. A lot of screens come with anti-glare coatings that may get damaged with glass cleaner. Turn off the PC and also unplug the monitor from the power source. Use the soft and clean moistened cloth for wiping off the screen. Remember, not to spray any liquid on the monitor as it may leak inside the monitor and damage the internal components of the machine.
Dealing with the spills
In case there is a spill of liquid onto the keyboard shut down the computer immediately and disconnect the keyboard. Now, move the keyboard upside down and let the liquid drain. In case the liquid is too sticky you must hold it on its side under the running water to rinse the liquid away. Keep the keyboard turned upside down for two days before you reconnect it. The keyboard might be beyond repair by now but this is the most suitable way of dealing with the problem. A better idea is to keep all drinks away from the computer area.
Never restrict the airflow around the computer. As the computer generates plenty of heat its casing has fans to stop the overheating. Avoid keeping stacks of books, paper, and other items around the computer. If you are looking to clean the house along with the computer you can think of hiring home cleaning professionals such as European Maids especially if you live in the Clearwater, FL area.
Picture Credit: Unsplash
Posted in Cleaning Products, Cleaning Service, Cleaning Service Clearwater, Cleaning Tips, Clearwater, Home Cleaning, House Cleaning, Maid Service, Residential Cleaning, Tips
Tagged #cleaning professionals, #cleaning Tip, Cleaning, Cleaning products, Cleaning the Computer, cleaning tips, Clearwater, Clearwater cleaning services, dust, Home Cleaning, House Cleaning, Tips, vacuum cleaner
Leave a comment
Home Cleaning By Disinfecting Your Home
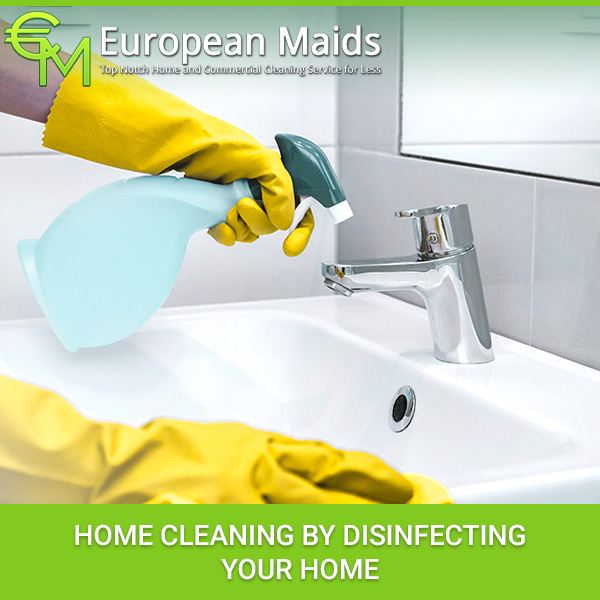 It is significant that you clean and disinfect the various surfaces inside the house. The different germs also are known as microorganisms can make people sick. These germs live on all kinds of surfaces and are capable of contaminating utensils, food, and other objects that are used for the preparation of food and eating it. In this battle against the germs, you might think that they have an advantage as they can be present anywhere at the same time. You can keep the infectious diseases such as cold and flu away by keeping these germs at bay.
Areas
The areas in the house with high traffic and various surfaces that are touched are the areas where germs are accumulated. One survey found out that the kitchen sink has more bacteria than garbage cans or toilets. One of the common places for germ build-up in the toilets is the toothbrush holder. This is because they are situated near the toilet and the act of flushing sends a mist of bacteria among these places. It is also easy to forget about them while cleaning the toilet and other obvious germ build-up areas.
Requirements
It is possible to remove dirt and grime by using hot water and soap. This may also get rid of some germs but it may not be enough for some other surfaces that are home to many germs. You can use a cleaner-disinfectant for speed cleaning as it is a combination of two steps. It is possible to use it for bathroom surfaces and kitchen countertops. Areas containing sticky spills can be cleaned by using soap and water. But while using disinfectants for home cleaning keep in mind to wear gloved and keep the windows open especially while using products containing bleach.
Products
If you are using disinfectants bought from the store stay away from breathing the chemicals. Keep in mind to wipe down the cleaned areas such as countertops later by using water. Allow these surfaces to dry out fully before you prepare any food on them. There are some effective homemade cleaners such as hydrogen peroxide and white vinegar but do not mix them. In case you are using hydrogen peroxide, you must test it on unseen surfaces to ensure that it does not fade or discolor the surface.
Quick home cleaning
For cleaning up super-fast you can use these shortcuts. Maintain all the cleaning products inside a basket. This will keep them ready for use when you are and it is easy to carry them from one room to another. After spraying the disinfectant you might have to wait. You can carry out other household chores at the time. Utilize a plastic can liner for controlling the spill of trash and leakage. It will also quicken the cleaning process for garbage and wastebasket. Remember to sanitize the refrigerator after cleaning it and also the floor spills when they take place. This will ensure that they do not turn into a larger mess. It is possible to take out some serious germ build-ups within half an hour or definitely in less than a day. If you do not have pets or children this becomes even easier. Always start in the kitchen for this.
Many times the home cleaning is a time-consuming task even for the experienced housewives. In case you are in a good position in terms of funds you can think about the option of using professionals by ordering their services via the internet. The wet home cleaning can be arranged at a time suitable to you. If you are living in the Clearwater, FL area European Maids is a good alternative.
Picture Credit: Jeshoots
Posted in Bathroom Cleaning, Cleaning Products, Cleaning Service, Cleaning Service Clearwater, Cleaning Tips, Clearwater, Green cleaning, Home Cleaning, House Cleaning, Kitchen, Residential Cleaning, Tips
Tagged #cleaning professionals, #cleaning Tip, bathroom, Cleaning, Cleaning products, cleaning tips, Clearwater, Clearwater cleaning services, Flu cleaning, Green Cleaning, Home Cleaning, House Cleaning, kitchen, Tips, vinegar
Leave a comment
Organizing The Freezer Cleanouts
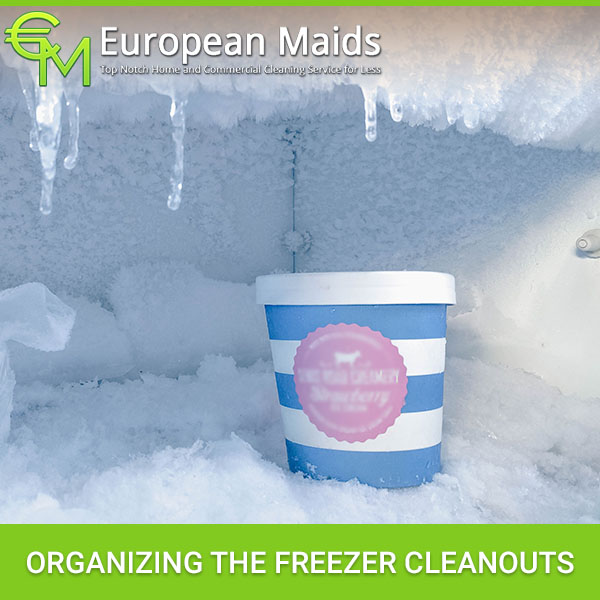 Although most people who are good at home cleaning are also quite capable of fridge cleanouts, it is easy to forget about the freezer. Although just the thought of freezer cleanout may bring a groan to many faces, it is not as difficult as it used to be. Due to the quantity of frost build-up, the freezer cleaning had developed a bad reputation. However, in modern refrigerators, you will not encounter this issue which means that you can finish cleaning the freezer within 30 minutes.
What you will need
Keep in mind that these instructions are for cleaning the freezer of your refrigerator. In case you have a deep freezer you will have to talk to the manufacturer or read instructions on the manual for cleaning. For cleaning the freezer you will need,
- Ice
- A large cooler
- Distilled white vinegar
- A spray bottle
- An old toothbrush
- Hot water
- Microfiber cloths
Instructions
1. Take out all the food items from the freezer and put them in the cooler with ice. Remember to check the expiry dates of various food items in the process. Remove all the food items that are past the expiry date.
2. Unplug the refrigerator for safety. Do not worry about the food items as they will stay cold for 4 hours without power inside the refrigerator according to the FDA. However, ensure that people are not moving in and out of the fridge while you are working.
3. Combine equal portions of hot water and vinegar inside the spray bottle. This will be the cleaning solution for the freezer.
4. Spray the mixture generously in the freezer and wipe away the solution by using the dry microfiber cloth. You may repeat the step a few times for getting a clean freezer.
5. If there are stubborn patches you can use the toothbrush with hot water to scrub clean the area and wipe away the residue by using the microfiber cloth.
6. Dry the freezer inside by using the microfiber cloth ensuring that there is no liquid lying behind.
7. Wash out the drawers of the freezer, ice trays, and bins.
8. Plug back the freezer and also replace the food items you removed earlier. In case the ice from the cooler has begun to melt, wipe away the liquid from the food items and return them to the freezer.
One of the biggest annoyance several people feel when they open the freezer is not finding what they are looking for to eat. Due to this, it is a good idea to properly organize the food items inside the freezer while replacing them after cleaning by using a system that works out for you.
If you are looking for high-quality home cleaning professionals in Clearwater, contact European Maids. They can complete the home cleaning for you efficiently and beneficially. This is particularly useful if you have allergies that flare up during the cleaning.
Picture Credit: Unsplash
Posted in Cleaning Products, Cleaning Service, Cleaning Service Clearwater, Cleaning Service Tampa, Cleaning Tips, Clearwater, Condominium Cleaning, Green cleaning, Home Cleaning, House Cleaning, Maid Service, Maid Service Tampa, Residential Cleaning, Tips
Tagged #cleaning professionals, #cleaning Tip, Cleaning, Cleaning Freezer, Cleaning products, cleaning tips, Clearwater, Clearwater cleaning services, Green Cleaning, Home Cleaning, House, House Cleaning, How to Clean Freeze, Tips, vinegar
Leave a comment
Wet Cleaning In The House With A Small Child
 Cleanliness is the key to health. And therefore, armed with jars, bottles and various brushes, we proceed to clean the apartment. Wet cleaning in the house will save households, and especially babies, of the harmful effects of the smallest particles contained in the air that enter the human body during inspiration.
It is difficult to overestimate wet cleaning, since it is clear to any mom that the child should breathe clean fresh air, and not dust. Just walking a broom in the corners, you will not achieve cleanliness in the apartment. And we must not forget that an excessive amount of dust in the room can lead to dangerous pulmonary and cardiovascular diseases, to the development of asthma or allergies.
In an apartment where a very small infant grows, it is necessary to carry out a full wet cleaning of the room at least twice a week. In addition, every day you need to wipe all surfaces in the apartment with a damp cloth to remove accumulated dust. When the baby turns one year old, it will be possible to reduce the number of wet cleanings to 4-5 per month.
Preparing for Wet Cleaning
So that cleaning the apartment does not take you much time, you need to properly prepare for it. For wet house cleaning you will need different sizes of microfiber cloths, cleaning products, a mop, a washing vacuum cleaner, a large bucket for mopping the floor, a small basin for washing various surfaces (shelves, window sills, tables). When cleaning the room, immediately bring everything you need. Running back and forth for every little thing means spending extra time and effort.
Top to Bottom, Left to Right
Wet cleaning should be carried out starting from the upper shelves, mezzanines and cabinets, gradually moving down. If you plan to wash windows – start with them. Then wipe the windowsill and radiator, all the shelves, cabinets, drawers, mirrors, shades. Wash floors last.
Do not save on the purchase of good napkins and brooms for dust removal, they will do the job well and will serve you for more than one month. Computer stores sell pretty expensive, but wear-resistant wipes to wipe the monitor. They are the best suited for washing mirrors and windows. You will be pleasantly surprised by the result!
And do not forget to rinse the rag more often, removing dust.
Wet Vacuum Cleaner
A washing vacuum cleaner will save you from having to carry water buckets and rub the floor with a rag. Modern washing vacuum cleaners allow you to clean almost any surface in the house from dust and dirt: laminate flooring, natural wood floors, tile, carpet, woolen carpets, furniture. A variety of brushes included in the kit will allow you to penetrate the most inaccessible corners of the apartment. Brushes are made taking into account features of various surfaces. Using a washing vacuum cleaner reduces the wet cleaning time of the house by two, or even three times.
If you have not yet acquired a washing vacuum cleaner, special cleaners and an ordinary, well-absorbing sponge will help remove dust and dirt from furniture upholstery and carpets. Follow the instructions on the package exactly and everything will work out. True, such a wet cleaning of woven surfaces will take quite a lot of time and effort.
An important point: if the house is not warm enough, do not venture to wet the carpet or furniture. Dampness, which can be formed due to the fact that the carpet dries for too long, is much more dangerous than dust. In the folds of furniture or deep in the pile of the carpet, mold can form, which is dangerous for the baby! Mold releases toxins into the atmosphere, which literally poison the human body, causing headaches, nausea and dizziness. Furniture and carpets should be completely dry during the day after wet cleaning.
Wet house cleaning is a time-consuming task even for an experienced housewife. And when a baby grows up in a family, it is all the more difficult to devote a proper amount of time and energy to this important part of life. Try to attract household members to the cleaning, because a husband or an older child may well wipe the dust.
If you are unlimited in funds, you can use the services of professionals by ordering through the Internet a wet cleaning of the apartment at a convenient time for you.
Picture Credit: Pixabay
Posted in Cleaning Products, Cleaning Service, Cleaning Service Clearwater, Cleaning Service Tampa, Cleaning Tips, Clearwater, Floor Cleaning, Home Cleaning, House Cleaning, Maid Service Tampa, Residential Cleaning
Tagged #cleaning professionals, #cleaning Tip, Cleaning, Cleaning products, cleaning tips, floor cleaning, Home Cleaning, House Cleaning, vacuum cleaner, Wet Cleaning
Leave a comment
Allergy Tips For Home Cleaning
 A good home cleaning can help those that suffer from allergies. Many symptoms that are triggered by dust and dirt will be alleviated once the home has been thoroughly cleaned. If you or anyone in your family suffers from allergies, this article will provide you with the best allergy tips.
A great allergy tip offered by many home cleaning companies is to wear a mask when you clean. This is imperative to keep any allergens out of your lungs, especially if you are working with dust or other minuscule things that easily float into the air without the naked eye seeing it. Once you have cleaned the house well, treat yourself to some outdoor time. This will not only allow your lungs to get some fresh air but will also limit the number of allergens breathed in after cleaning.
First, you should plan on vacuuming one to two times per week. Your vacuum cleaner should have a HEPA filter on it. A HEPA filter will allow smaller particles to be caught so they do not sneak through the filter back into the air.
If your home is cluttered, you may wish to cut down on your belongings. Lots of picture frames and knick-knacks mean more to dust, while boxes of books or piles of clothes can easily hide dust mites and other allergens.
No one likes a dirty shower. But another good reason to scrub it on a regular basis is that mold can develop. And when mold develops, allergens can be released into the air. See about tossing your shower curtain into the washing machine if you are able to. If not, clean it in the tub and allow to dry.
Bedding, such as sheets and pillowcases, need to be washed weekly in hot water. The water should be at least 130 degrees Fahrenheit. This temperature will ensure that dust mites are killed. And if you have children, be sure to wash their stuffed animals weekly as well. Blankets and quilts that are used should also be washed on a regular schedule.
Our next allergy tip is hard for many but really does help. Instead of purchasing scented laundry soaps, buy ones that do not have any scent. Fragrances in these soaps can often trigger allergies. Unscented soaps will clean your clothing just as well. Once the clothes have been dry, toss them into the washing machine. If you or your family suffers from allergies, never hang your wash outside. Pollen and mold can often be found on clothing that was allowed to air dry outside.
If you are looking for a way to get a home that clean and will not trigger your allergies, but do not have the time to use our allergy tips, consider hiring a home cleaning company, such as European Maids. These companies will deep clean your home for you. Most of them will not only vacuum all floors, but dust and mop as well. It could also be very beneficial to hire a home cleaning company if you yourself have an allergy to dust.
Picture Credit: 123rf.com
Posted in Cleaning Products, Cleaning Service, Cleaning Service Clearwater, Cleaning Tips, Home Cleaning, House Cleaning, Maid Service, Maid Service Tampa, Residential Cleaning, Tips
Tagged #cleaning professionals, #cleaning Tip, allergy house cleaning service, allergy tip, Allergy Tips For Home Cleaning, cleaning tips, Home Allergies, Home Cleaning, House Cleaning, kitchen
Leave a comment
8 Unknown Uses For Dishwasher Tablets
 Dishwasher tablets do a dirty job, literally, when you do not see it. However, they not only help to bring the dishes to order. We write about the less common roles of dishwasher tablets.
Dishwasher tablets not only effectively wash dishes. They can also include eliminate dirt in the oven or restore the original color to white fabrics.
The dishwasher tablets of most of us are associated only with dishwashing. This is no discovery. One can discover, however, the unusual use of these tablets for other purposes. We provide where dishwasher tablets are still effective in our home and how useful they can be in everyday life.
Dishwasher tablet in the washing machine
If the white shirt collar has become unsightly, yellow, you can try to restore it to the previous color by putting a dishwasher tablet in the washing machine before washing. For she should whiten fabrics that have lost their color in this way, but also by dying.
By using a dishwasher tablet, you can also clean the inside of the washing machine. You need to put one or, preferably, two tablets into the drum and place the empty washing machine on the washing program. The center of the washing machine will be clean, there will be no stone, and a fresh smell will come out of the drum.
Dishwasher tablet in the fight against stains
It happens that stain remover or bleach are not effective in fighting stains on fabrics. You can then try the effectiveness of the dishwashing tablet in the dishwasher. For a stain (even from coffee or wine) you need to pour a little water and rub a tablet into it. After several minutes, rub the cloth once more and wash it normally. There should be no trace after the stain.
A dishwasher tablet in the sink
When fat, dried remnants and other types of dirt do not intend to disappear from the pan or pot under the influence of ordinary dishwashing liquid, pour warm water into the sink, put the tablet into the dishwasher and then place the dirty dishes in the water. The tablet will dissolve in water and it will be much easier to clean plates or bowls. If there is a sludge from tea, coffee or even from the water on the glasses, it will disappear just like the mentioned tablet.
Tablet for the cutlery dishwasher
If forks, knives, spoons and teaspoons have lost their shine, it is worth them to bring them back. You can use a special rinse aid for this purpose, and you can choose another way: use a dishwasher tablet. Fill the sink with warm water and throw a tablet into it. When it dissolves, you have to put the cutlery. A few minutes later, just wipe them with a sponge and dry them.
Dishwasher tablet in the oven
When the walls and bottom of the oven stick to the fat, the traditional washing liquid can not cope again. This is why, in this case, it is good to remember about the dishwasher tablet. You need to dissolve it in hot water and clean the oven with a rag or sponge in it. The tablet should solve the problem. However, wait at least an hour and then clean the oven completely. Similarly, you can wash burned sheets or cake rollers. In this case, however, it is worth first dissolving the tablet in hot water and leave it for about 2 hours.
A dishwasher tablet on the wall
The moment of our inattention and the toddler is already drawing on the wall in a room or other room. It is not always easy to remove traces of crayons or markers. It happens that paint also goes out with dirt. You can try to save the walls by reaching for a dishwashing tablet in the dishwasher. Dissolve it in a bowl of warm water and wipe the dirty surface with a damp sponge.
Dishwasher tablet in a trash bin
The fact that we put a sack in the kitchen, usually in the kitchen, put a waste in it, does not guarantee that the trash can be clean. You can see it after we remove the garbage bag. We can see stains, sometimes even mold, and a peculiar, bad smell. Warm or hot water will help clean the trash can. Pour water into the garbage can and dissolve the tablet in it. After at least a dozen or so minutes (preferably wait an hour), the water must be poured and the bucket rinsed. It will be clean and disinfected.
Dishwasher tablets in the toilet
When a sediment and stains appeared on the walls of the toilet bowl, they can be removed using a dishwasher tablet. You need to dissolve the tablet in the water in the shell and wait a few minutes, then brush the walls and the bottom with a brush, then rinse. It will be clean and disinfected.
Picture Credit: PhotoMIX-Company
Posted in Cleaning Products, Cleaning Service, Cleaning Service Clearwater, Cleaning Tips, Home Cleaning, House Cleaning, Kitchen, Maid Service, Residential Cleaning, Tips
Tagged #cleaning professionals, #cleaning Tip, cleaning tips, dishwasher tablet hacks, dishwasher tablet to clean sink, Dishwasher Tablets, Home Cleaning, House Cleaning, Using Dishwasher Tablets, Washing Machine
Leave a comment
Why You Need Help Cleaning House After Repair
 House cleaning after repair is one of the most sought-after and popular services provided by a cleaning company. Today we will talk about whether cleaning after repair is so necessary and what it is.
Cleaning after repair is a complex multi-component service that surpasses even general cleaning at home in complexity. When the repairs are just finished on the premises, there are a lot of tasks for the cleaners on high-quality cleaning and dedusting. The most extensive such cleaning happens when the furniture has not been removed aside from the limits of the house and construction dust has fallen on it.
House cleaning after repair is necessary:
The apartment has building dust. Unfortunately, it is almost always there, which is especially detrimental to soft fabric furniture, curtains and curtains, carpets and carpets. In such cases, it is impossible to do without dusting, but it is extremely difficult and time-consuming to carry out manually.
If you want to move to a new house as quickly as possible. The cleaning of the house after the repair usually leaves a team of specialists with special tools and tools – they will induce cleanliness as quickly as possible. This is especially convenient if the living space is being prepared for change.
If you want to save time. Saving time and money is one of the main advantages. You save time, which can be used to solve important tasks, at the same time, the cleaning service will do all the work much faster and more thoroughly. If you count the costs of cleaning products, equipment, and the like, it turns out that applying to a professional form is much more economical.
If you are not a fan of house cleaning. Cleaning after repair is not an ordinary cleaning where it is sometimes enough to clean the dust from furniture and clean the floors for cleanliness. This is the most thorough and complete cleaning that will help not only to forget about the fact that yesterday you had a repair, but also to keep it clean for a long time. That is why it is desirable to invite experts to perform such a difficult task. More information about what exactly is included in the cleaning after repair can be found here.
If you do not want to damage the surface and finish of the house and it needs careful, but especially careful cleaning. Our eco-products not only do not pose a threat to the health of your household (even small children and pets), but also do not spoil the surface of the house. It is also worth considering the great experience and special care of our specialists.
Picture Credit: rawpixel
Posted in Cleaning Products, Cleaning Service, Cleaning Service Clearwater, Cleaning Tips, Home Cleaning, House Cleaning, Residential Cleaning
Tagged #cleaning professionals, #cleaning Tip, Cleaning after repair, cleaning company, cleanliness, Clearwater, Home Cleaning, House Cleaning, Saving time
Leave a comment
How to Keep Your Child’s Bedroom Clean
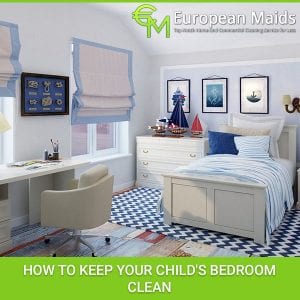 How to quickly and efficiently clean the children’s room.
For cleaning the children’s room will require:
- Basket, bag or box for toys and small things
- Vacuum cleaner or broom
- Mop
- Microfiber cloths
- Garbage bags, rubber gloves.
The main task that confronts parents cleaning a child’s room consists of 5 items.
1. Reduce the number of toys. The more toys in the child’s bedroom, the more often there is a mess. Children stop noticing their toys, throw them into the general pile and ask to buy new ones. Therefore, adults should collect toys from the floor, from under the bed and from behind the door, sort them into categories and put them in boxes or baskets. Naturally, you need to show the child what and where it lies so that he himself can find the necessary things.
To reduce the number of unnecessary toys, to avoid the protest of the child, you need to gradually remove some of them from him. Such a “quarantine” for toys will help identify which ones are expensive and necessary for a child, and which ones can be thrown away or redrawn.
2. Remove clothes in the room. In the upper part of the closet, seldom-used items should be folded – off-season clothes or fancy dresses.
Basic seasonal clothing must be sorted by color – so the child will remember that where it lies. Socks and other small wardrobe items should be put in the bottom drawer so that the child can easily reach them.
3. Remove trash in the room. What may seem adult rubbish for the child – a treasure. Therefore, only obvious rubbish should be thrown out of the children’s room. You also need to collect items that should not be in the child’s bedroom and place them in places.
4. Wipe the dust, clean the windows and the floor. This should be done with rubber gloves. Sweep and clean the floor is easy when all the toys and things are collected and placed in places.
Once a week it is necessary to move furniture away and remove dust in hard-to-reach places: under the bed and table, behind the dresser and wardrobe.
Lightly microfiber cloth moistened with water should be sure to wipe dust off books, upper shelves, decor items, chandeliers, leaves of houseplants. You also need to knock out dust from soft plush toys.
5. Cover the bed, remove things in the laundry. Cover the bed, smooth the sheets, blanket, bedspread, whip pillows. This is an important stage of cleaning – so you quickly teach the child to order. He must see that this is a daily obligatory “ritual.”
Cleaning rules in the child’s bedroom
- In the process of cleaning a child’s room, you can not use aggressive household chemicals (means for washing the floor, windows and laundry), so as not to cause an allergy to the child. It is better to choose hypoallergenic powder or baby soap.
- In order for the children’s room to always be in a more or less impartial state, it is necessary to constantly maintain order in it. Therefore, together with the child should be laid daily toys in places.
- It is necessary to regularly ventilate the room so that dust does not accumulate in the room.
- When cleaning the floor in the child’s bedroom is better to use a vacuum cleaner with a function of wet cleaning.
How to teach a child to order in the room
In order for the child to learn how to clean up on his own, clean up and put his things in place, one should teach him:
- make your bed every day;
- hang clothes in the closet or put them in the laundry basket – for further washing;
- put toys and books in their designated places;
- do not leave food in the room and, if possible, do not eat in the child’s bedroom;
- take out the garbage yourself (or ask adults). This will teach the child to timely clean up.
Using the services of a cleaning company, you can be sure that your home will always be clean!
Picture Credit: Pixabay
Posted in Cleaning Service, Cleaning Service Clearwater, Cleaning Tips, Clearwater, Floor Cleaning, Home Cleaning, House Cleaning
Tagged #cleaning professionals, #cleaning Tip, cleaning and organizing, cleaning tips, floor cleaning, Home Cleaning, House Cleaning, kids cleaning rules, Remove trash, unnecessary toys, Windows
Leave a comment
How To Organize Your Spring Cleaning
 When it comes to cleaning in the spring, give it enough time and decide in advance what you want to clean. Worth to write a list. With systematic spring cleaning you save precious time.
Ideally, you should focus on one room at a time. As a rule, things are removed from top to bottom in the following order: first remove dust from all surfaces, such as cabinets, tables, window sills and plants. The second step is to clean the upholstery and furniture. The floor is being removed at the end.
We all have a basic cleaning list, but how many places do we remember? You know, the ones we avoid by sight, pretending that we do not see dust cats.
Here are 7 areas that really will complete the spring cleaning:
Wardrobe
Hide warm winter things. Get ready for spring, summer. You will refresh your wardrobe and you will probably find a few forgotten summer pearls. Remove the shelf from the dust, put the fragrance bag on one of the shelves – thanks to that you will feel the spring every time you open the wardrobe!
Kitchen cabinets
It does not matter if you cook a little or a lot. The sludge and dust settle on cabinets at the rate of lightning. It’s worth to vacuum them off from time to time.
The interiors of the cabinets hide many delicious treasures. Take a look at whether your carefully stocked supplies are still useful to eat. If not, throw them away. Make room for new ones.
Windows
How cool it is to be able to look at the windows shining in the sun. Washing will not take you much time, and the effect will definitely be worth the work done. Do not forget about washing curtains and curtains. They are dust absorbers. After washing, the whole flat will smell nice and fresh.
Look under the bed
This is not the place we remember. However, it is a vault of dust, hair elastics, earrings and socks. Do you sleep well, aware of the additional “mattress” growing under your bed? That is why it is worth to lift the bed once in a while, thoroughly vacuum and wash the floor. And the joy of finding things in the bonus.
Cushions
Wash or bring decorative cushions, plaids or rugs to the laundry room. Especially with pets, these things get dirty much faster. They catch fur. Refreshed, ironed will be pleasing to the eye.
Fridge
People do not love to clean the fridge, but you have to do it regularly. In the end, we store food in it. Check that jams, mustard and ketchup have a good expiration date. Delete what is old. Make room for fresh tomatoes, fresh vegetables and fruits.
Tool storage
How many times in a hurry did you have to drill or screw something and then put the equipment carelessly into the box. Sort tools, nails and other accessories. Maybe, by the way, you’ll find inspiration for small patches at home?
Picture Credit: Pixabay
Baking Soda Uses: Brilliant Home Remedies
 Baking soda is one of the natural substances commonly used in the household. It has many uses at home – we chose the 8 most interesting. Baking soda is good for cleaning, removing scale from the kettle or microwave or grout stains.
You can buy baking soda easily in the store, because it is a popular product often used for baking. But baking soda has many other uses at home: kitchen, cosmetics, health care and cleaning. Soda is great for cleaning many home appliances. Here are some ideas for using baking soda at home. You do not have to buy ready-made chemicals to effectively clean!
Soda will help us maintain cleanliness and speed up the preparation of meat dishes, cooking peas and beans. We can use it to clean the microwave oven, thanks to it we will get rid of the unpleasant odor from the refrigerator and remove the stone deposit. Baking soda can be used instead of baking powder, it is also perfect for cooking cauliflower. If you are bothered by the unpleasant odor of this vegetable, necessarily add a pinch of soda to the cooking water. Soda perfectly kills bad smells! Thanks to it, in a few moments we will get rid of the irritating smell of garlic or fish. All we need is to rub our hands with soda. Guide for 8 applications of baking soda!
1. Baking soda for cleaning the microwave
The microwave oven, when it is rarely washed, is covered with a layer of greasy dirt. To clean the microwave oven, simply wipe the walls with a damp sponge, to which we will pour out some baking soda. The next steps are wiping the inside of the oven with a damp cloth and finally dry.
2. Baking soda for cleaning grouts
Dust settles on the floors. It is easy to remove it from ceramic tiles using a regular mop, worse with fugues. The reliable baking soda will help here. For cleaning tiles and grouts, we use water with a diluted spoon of baking soda and soap petals. After cleaning, wipe the glaze with a dry cloth.
3. Home bleach with baking soda
Baking soda will also protect our white things so that they do not gray during washing. Just add half a glass of baking soda to each wash.
4. Removal of stains with baking soda
Yellow patches of sweat from a blouse or shirt will help to remove the mixture of baking soda with hydrogen peroxide and ordinary water – mixed in equal amounts and applied directly to the stain. The mix needs to be lightly rubbed into the stain with a brush and left to absorb, and then wash your clothes.
5. The use of baking soda at home: cleaning the iron
The burnt iron foot can be cleaned with a mixture of baking soda and vinegar. A slightly heated iron (so that it could be touched by hand) should be wiped with a cloth soaked in a mixture of vinegar and baking soda.
6. How to remove the stone from the kettle using soda?
Sludge and stone from the kettle will effectively remove baking soda. Pour the contents of the baking soda package into the kettle, pour over water and bring to the boil. Then mix the whole vigorously and pour out. Repeat this step until all the stone from the kettle has been removed. At the end, scrub the kettle with a hard brush and dishwashing liquid.
7. The use of soda at home to remove unpleasant odors
An odor from sweaty, moistened shoes will help to remove baking soda. Put about half a bag of baking soda in your shoes, ideally do it overnight. Leave your shoes like that and in the morning soda shake thoroughly. After the unpleasant smell, there should be no trace! You will remove the unpleasant odor in the trash after wiping the washed trash can with a sponge dipped in a soda solution. Also, soda inserted in the fridge will let you get rid of the unpleasant odor.
8. Baking soda cleans clogged pipes
Clogged sewage pipes clear baking soda mixed with vinegar. Mix half a glass of soda with a glass of vinegar and pour into the drain. When the mixture stops hissing, pour 2 liters of hot water there.
Picture Credit: Pixabay
Posted in Cleaning Products, Cleaning Service, Cleaning Service Clearwater, Cleaning Tips, Floor Cleaning, Home Cleaning, House Cleaning, Tips
Tagged #cleaning professionals, #cleaning Tip, Baking Soda Uses, Cleaning, cleaning grouts, cleaning the iron, House Cleaning, Microwave, remove unpleasant odors, vinegar
Leave a comment


